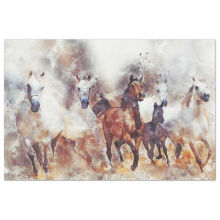
Horses and the Joy They Bring

Well, she isn't the only girl I know with a love of horses. The daughter of my dearest friend Amy is too. She's actually training to be a barrel racer and has the sweetest horses named Hippy and Secret. Well, my sweet friend, Amy, and her family moved to their dream home a couple of months ago and I wanted to make something extra special for Madison. It's always the homeowners who get the housewarming gifts and the kids are usually left out.
I started with an idea, then I remembered I had another sheet of the decoupage paper I used on my daughter's desk. I knew I wanted to go in a totally different direction with this piece than I did with my daughter's desk, I just didn't know which direction.
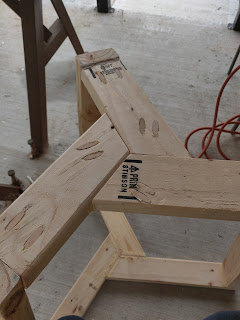
I had planned on upcycling a framed art piece I picked up at the thrift store but the frame, mat, and existing art were all one piece or just really glued together well. Turns out the artwork was just painted on a foam board you can pick up at Walmart. The frame is gorgeous and the matting is well done but I'm glad I only paid ten dollars for it considering the foam board. Back to the drawing board. I had a canvas art piece I picked up at that same thrift store, but it was twice the size I needed. The third stroll through my horde netted another framed art piece, but it was too small. I was beginning to feel like Goldilocks. So I walked away from my special project and started working on a double coffee table to entry bench conversion. The blog will be forthcoming when I get them done. But inspiration struck that could solve my canvas problem. I could just join a few boards together and make my own art foundation in the size I need. Of course, that brought up another problem called weight. This thing is heavy, but that's what wall studs are for.

After priming and painting on a base coat of Dixie Belle's Sawmill Gravy on the board I did a dry fit of the paper. I tore off the edges all the way around the paper to make it easier to blend into the paint. I just used an artist brush and a little water to wet the edges then pulled it off with my finger.

Now it was time to start painting before decoupaging the paper. I used four colors from Dixie Belle - Sawmill Gravy, Mud Puddle, French Linen, and Driftwood and just splotched them all over before blending.


Once that was dried I put a coat of polyacrylic on it. Now it was time for the paper. I'm not a fan of mod podge so I use polyacrylic as glue for my papers as it holds better. The downside of that is that papers have a tendency to wrinkle more and take longer to stretch back out as they dry.

You can see the wrinkles and bubbles while it was wet.
Once that was dry and after a lot of back and forth with getting the wrinkles and bubbles out it was time to paint. I went back and forth on which of the colors I should use. I tried using reds and yellows on the bottom to make it match the paper but I just couldn't get the colors right and it looked awful to me. The blues and grays I used on top for the sky blended beautifully so I was very disappointed that I couldn't get the "ground" to look just as nice. In the end, I just blended together Sawmill Gravy and Driftwood for a cloud effect. 


That smile on her face was says it all.
After it was all said and done and I put on four or five coats of polyacrylic on the top for protection. It's overkill I know, but I want Madison to be able to enjoy this art piece for years to come. The fun part was making a date to go visit so I could surprise Madison with her housewarming gift. I was so nervous that she wouldn't like it or think it was corny, but one look on her face put me at ease.


Comments
Post a Comment